Proper Cork Preparation
Posted by Matteo Lahm on 20th Jan 2025
To Soak or Not to Soak: That Is the Question?
Should you soak your corks before bottling? Cork prep is one of those topics where you can ask ten different winemakers and get ten different answers. Let’s get to the bottom of this wine barrel and dispel some urban myths in the process. Often, your prep is more about your corker than your cork. The soaking debate is like wine that has been aging for far too long, and pardon the irony, it's high time to put a cork in it.
To begin, it is important to clarify that not all corks are created equal. You've got your natural corks, your synthetic corks, and even your agglomerated corks. Each type has its own quirks and characteristics, and how you treat them can make a world of difference in your bottling process. Furthermore, the type of corker you use can matter even more than the cork itself.
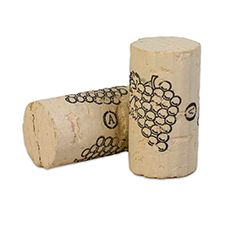
Let's start with the romantic favorite, the natural cork, which also includes amalgamated corks. If you're using a high-quality floor corker, you're in luck. There's no need to soak or sulfite these corks if they were packaged with SO2 gas. Most are and will say so on the packaging. You can safely use them dry with a floor corker.
However, if you're having a bit of trouble inserting longer corks, or if they were repackaged prior to sale, a quick dip in a sulfite solution while you're bottling should do the trick. If the package has been opened and you’ve been storing your corks for a while, a sulfite rinse is the safer bet regardless. Natural corks are organic. They react with their environment, and you cannot see what might be lurking around in your basement.
On the other hand, if you're using a small, hand-held corker, you will likely need to give your corks a bit more TLC. A hand-held corker does not have the torque or precision of a floor corker, so inserting a dry cork without damaging it is more difficult. Soak your corks in a sulfite solution for up to 15 minutes. If they are playing hard to get and still refuse to pass through your hand-held corker, try adding ½ cup of glycerin to every gallon of warm water you use for soaking. This will ensure your corks get enough moisture to glide through the corker without denting the tops or turning them into a crumbly mess.
Now, let's talk synthetic corks. These are the rebels of the cork world, doing their own thing and not caring what anyone thinks. They are not organic or porous like natural corks, which makes them more resistant to contaminants. But on the flip side, fitting them in the bottles can be a bit more arduous. Just dip them in a sulfite solution and they're good to go. That will ensure they are both sanitary and make them easier to insert in your bottles.
Now for warnings and advisories. Some might suggest boiling your corks or soaking them in sulfite solutions for extended periods. Unfortunately, these are very bad ideas. Remember, cork is tree bark, and boiling it turns it into mush. And mush won't seal your bottles. It is best not to waste your time with unnecessary processes that will only increase the risk of cork taint and spoilage.
Finally, never use straight tap water. Tap water is not sanitary so if you need to wet your corks, make sure you use a sulfite solution or distilled water in a sanitary container. Microbes are sneaky profiteers that will exploit any opportunity to spoil your wine.
Now you can bottle your wine knowing the facts and with some peace of mind. Once and for all, the great cork debate is now uncorked. Whether you're a natural cork purist or a synthetic cork maverick, remember that the key to successful corking is that your corks and the kind of corker you use determine your course of action. And always remember to store your unused corks in a well-closed bag to keep them in tip-top shape for your next bottling bonanza. Happy corking!


